In the previous part -1 I just show what Jcache looks like, however in reality an enterprise application is built in multi-layers with recurrent access to database that consume many resources and delay the response time.

So what I want to present in this article is how to use Jcache as a separation between the service layer and the database access layer that means that in every read/write operation we can store, read or update objects in the cache.

Prerequisites.

To execute the code in this article you need

  • MySQL database, I user MySQL 5.5
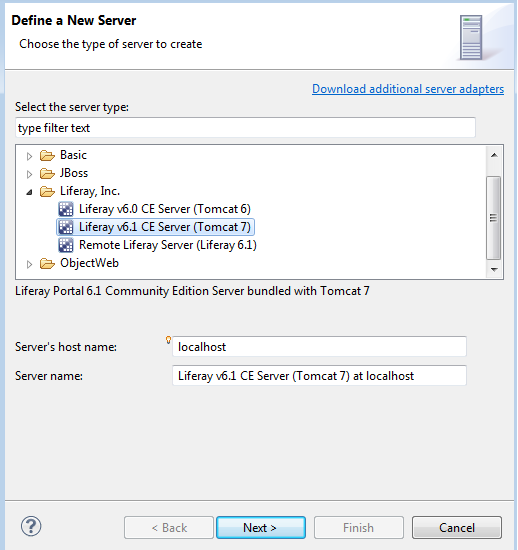
  • Apache Tomcat 7.
  • MySQL connector for java – mysql-connector-java-5.1.9-bin.jar
  • Java Temporary caching API.

In Action

I create a servlet as controller , a model and DAO classes to manage the interaction with the application and the database.

The code is organized like the following:

First, initialize and configure the cache:


UserDao.initConnection();

if(this.cache == null){

CachingProvider provider = Caching.getCachingProvider();

CacheManager manager = provider.getCacheManager();

MutableConfiguration<Integer, User> configuration = new MutableConfiguration<Integer, User>()

 .setTypes(Integer.class, User.class)

 .setExpiryPolicyFactory(AccessedExpiryPolicy.factoryOf(Duration.ONE_MINUTE))

 .setStatisticsEnabled(true);

 if(manager.getCache("cache")==null)

 this.cache = manager.createCache("cache", configuration);

}

I make this code in the public void init(ServletConfig config) of the servelet, then I create two classes User class and UserDao class. (for the complete code please refer to the code source section).

I use the protected void doGet(HttpServletRequest request, HttpServletResponse response) to read/write values from database if not available in the cache.

// Write in DB & cache

String action = (String)request.getAttribute("action");

if(action != null && action.equals("w")){

for(int i=0;i<100;i++){

User user = new User();

user.setFirstname(UUID.randomUUID().toString());

user.setLastname(UUID.randomUUID().toString());

user = UserDao.save(user);

if(user != null)

cache.put(user.getId(), user);


}

}

// reading operation

PrintWriter pw= response.getWriter();

for(int i=0;i<100;i++){

User user = cache.get(i);

if(user==null){

pw.write("load from database\n");

user = UserDao.load(i);

if(user != null){

cache.put(user.getId(), user);

pw.write(user.getFirstname()+"\n");

}

}else{

pw.write("load from cache\n");

pw.write(user.getFirstname()+"\n");

}


}

Let me explain what happen in the previous code. If the action attribute is not null and equal to “w”, so write values in the database and cache, you notice her that in every request, two operations are required and must made by the developer: writing in the database and the cache, in a next tutorial we can evolve this code to use the read-through and write-through available in the Jcache API.

Then the application retrieve values from the cache, User user = cache.get(i); if not exist, load it from the database and put it in the cache.

Code source

 https://github.com/khorri/jcache/tree/master/CacheExample

Introduction

It’s evident that using and managing cache in any Java enterprise application has a big importance. This importance coming from the large requests can an application receives, so it’s beneficial to store some response in the cache, and then can be sent in similar condition.

The idea of making a specification to manage caching begins in 2001; however the final specification does not released until March 2014 with the JSR 107.

Concepts

I think the specification make a good definition for every concept in the Java temporary caching API:

“The Java Caching API defines five core interfaces: CachingProvider, CacheManager, Cache, Entry and ExpiryPolicy.

  • A CachingProvider defines the mechanism to establish, configure, acquire, manage and control zero or more CacheManagers. An application may access and use zero or more CachingProviders at runtime.
  • A CacheManager defines the mechanism to establish, configure, acquire, manage and control zero or more uniquely named Caches all within the context of the CacheManager. A CacheManager is owned by a single CachingProvider.
  • A Cache is a Map-like data-structure that permits the temporary storage of Key-based Values, some what like java.util.Map data-structure. A Cache is owned by a single CacheManager.
  • An Entry is a single key-value pair stored by a Cache.”

Some things are very important here and is noticed in the specification that:

While Caches and Maps share somewhat similar APIs, Caches are not Maps and Maps are not Caches”. The most differences between Map and cache can be outlined like the following:

  • Cache keys and values must not be null.
  • Entries may expire.
  • Entries may be evicted.

Example

This simple example contain a servlet “CacheServlet” that create a default CacheManager, configures a cache on it called “hello-world” with a key type of String and a value type of String and an expiry of one minute, I use one minute just to show you the cache expiration.

@WebServlet("/CacheServelet")
public class CacheServelet extends HttpServlet {
private static final long serialVersionUID = 1L;
private Cache<String, String> cache;
/**
* @see HttpServlet#HttpServlet()
*/
public CacheServelet() {
super();
// TODO Auto-generated constructor stub
}


/**
* @see HttpServlet#doGet(HttpServletRequest request, HttpServletResponse response)
*/
protected void doGet(HttpServletRequest request, HttpServletResponse response) throws ServletException, IOException {


if(this.cache.get("hello-world")==null){
this.cache.put("hello-world", "new hello world");
response.getWriter().write("The Hello-world value is expired - ");
}
response.getWriter().write(this.cache.get("hello-world"));
}


/**
* @see HttpServlet#doPost(HttpServletRequest request, HttpServletResponse response)
*/
protected void doPost(HttpServletRequest request, HttpServletResponse response) throws ServletException, IOException {
// TODO Auto-generated method stub
}

@Override
public void init(ServletConfig config) throws ServletException {
// TODO Auto-generated method stub
super.init(config);
if(this.cache == null){
CachingProvider provider = Caching.getCachingProvider();
CacheManager manager = provider.getCacheManager();
MutableConfiguration<String, String> configuration = new MutableConfiguration<String, String>()
.setTypes(String.class, String.class)
.setExpiryPolicyFactory(AccessedExpiryPolicy.factoryOf(Duration.ONE_MINUTE))
.setStatisticsEnabled(true);
if(manager.getCache("cache")==null)
this.cache = manager.createCache("cache", configuration);
cache.put("hello-world", "hello world");
}
}

}

After you deploy the project in a servlet container (I use tomcat 7), enter the following URL in the browser:

http://localhost:8080/CacheExample/CacheServelet

So during the first minute you get “Hello world”, after that duration (ONE_MINUTE) you get

The Hello-world value is expired – new hello world

This expression means that the old value in the cache is expired and new one is created.

In the next part we can deep more in the java caching using the Jcache API

Source

The code source is available in:

https://github.com/khorri/jcache

In this post I want just to share the code how to add or insert an image in spreadsheet like (MS Excel) using the Apache poi API. When I work in a project I’ve the following use cases :

  1. In every generated (Excel) report, the application’s logo must be inserted in the top-left corner
  2. The logo must take 3 lines and 5 columns, and the top-left corner of the logo must be in specified (x,y).

The code source :

private static void insertImageWithFilename(Workbook workbook, HSSFSheet sheet, int col,
            int row, double scaling, String fileName) {
        try {

            InputStream is = new FileInputStream(fileName);
            byte[] bytes = IOUtils.toByteArray(is);
            int pictureIdx = workbook.addPicture(bytes, Workbook.PICTURE_TYPE_PNG);
            CreationHelper helper = workbook.getCreationHelper();
            Drawing drawing = sheet.createDrawingPatriarch();
            ClientAnchor anchor = helper.createClientAnchor();

            anchor.setRow1(0);
            anchor.setRow2(2);
            anchor.setCol1(0);
            anchor.setCol2(4);
            anchor.setDx1(400);
            anchor.setDy1(100);
            anchor.setDx2(950);
            anchor.setDy2(300);
            anchor.setAnchorType(2);
            drawing.createPicture(anchor, pictureIdx);

        } catch (FileNotFoundException fnfe) {
            System.out.println("FileNotFoundException:" + fnfe.getMessage());
        } catch (IOException ioe) {
            System.out.println("IOException:" + ioe.getMessage());
        }
    }

In the first part of this tutorial, we prepare and test the environment to develop an application with LR 6.1, JSF 2.1 and the PrimeFaces.

In this part we add some interaction to the application with a form that contains two fields and button for sending data to the server.

So let’s go

1-Create the form in the view.xhtml

the view.xhtml looks like the following :

<?xml version="1.0"?>

<f:view
xmlns="http://www.w3.org/1999/xhtml"
xmlns:c="http://java.sun.com/jsp/jstl/core"
xmlns:f="http://java.sun.com/jsf/core"
xmlns:h="http://java.sun.com/jsf/html"
xmlns:p="http://primefaces.org/ui"
xmlns:ui="http://java.sun.com/jsf/facelets"
>
<h:head />
<h:body>

<h:form id="frm">

<p:panel id="panel" header="New User" style="margin-bottom:10px;">
<p:messages id="messages" />
<h:panelGrid columns="3">
<h:outputLabel for="firstname" value="Firstname: *" />
<p:inputText id="firstname"
value="#{userBean.firstname}" required="true" label="Firstname">
</p:inputText>
<p:message for="firstname" />

<h:outputLabel for="lastname" value="Lastname: *" />
<p:inputText id="lastname"
value="#{userBean.lastname}" required="true" label="Lastname"/>
<p:message for="lastname" />
</h:panelGrid>
</p:panel>

<p:commandButton value="Submit" update="panel,display" id="ajax"
actionListener="#{userBean.newUser}" styleClass="ui-priority-primary"/>


<p:panel id="display" header="Information" style="margin-top:10px;">
<h:panelGrid columns="2">
<h:outputText value="Firstname: " />
<h:outputText value="#{userBean.firstname}" />

<h:outputText value="Surname: " />
<h:outputText value="#{userBean.lastname}" />
</h:panelGrid>
</p:panel>

</h:form>
</h:body>
</f:view>

The form contains two input fields, the firstname and lastname , this fields are required, we do that just to show you how PrimeFaces  displays errors if fields are empty.

The <p:commandButton> submit the form, by default PrimeFaces use Ajax in submitting forms to disable this option you can just add “ajax=false” to <p:commandButton>. The actionListener=”#{userBean.newUser}” tag used to indicate the JSF witch method can be invoked in the Invoke Application phase.
<p:messages id="messages" />  and
<p:message for="firstname" /> to display global and field messages

2- Create the Bean class.

@ManagedBean(name ="userBean")
@RequestScoped
public class UserBean implements Serializable{

/**
*
*/
private static final long serialVersionUID = -2653055197059240828L;
private static final Logger log = Logger.getLogger(UserBean.class);

private String firstname;
private String lastname;

public UserBean() {

}

public String getFirstname() {
return firstname;
}

public void setFirstname(String firstname) {
this.firstname = firstname;
}

public String getLastname() {
return lastname;
}

public void setLastname(String lastname) {
this.lastname = lastname;
}

public void newUser(){
log.info("---------->> Create new user : "+firstname+" "+lastname);
}

}

In this bean there’s nothing special except two things, the first one is:

The annotation @ManagedBean(name =”userBean”) which registers the class as Managed Bean class at runtime that can be managed by the JSF framework, for more information about this annotation please refer to the documentation.

The @RequestScoped annotation specifies that a bean is request scoped.

3 – Build and Deploy the application

Start the Liferay tomcat server

Right-click on build.xml and select Run as -> Ant build, If you see some thing like this in the console

19:18:18,507 INFO  [pool-2-thread-2][HotDeployImpl:178] Deploying Tutorail-portlet from queue
19:18:18,509 INFO  [pool-2-thread-2][PluginPackageUtil:1033] Reading plugin package for Tutorail-portlet
8 avr. 2014 19:18:18 org.apache.catalina.core.ApplicationContext log
INFO: Initializing Spring root WebApplicationContext
19:18:18,846 INFO  [pool-2-thread-2][HookHotDeployListener:550] Registering hook for Tutorail-portlet
19:18:18,849 INFO  [pool-2-thread-2][HookHotDeployListener:690] Hook for Tutorail-portlet is available for use
19:18:18,899 INFO  [BridgeImpl] Initializing Liferay Faces Bridge 3.1.0-rc2 (Galatia / Jul 14, 2012 AD)

that means that the portlet is successfully deployed, Launch the browser and enter http://localhost:8080/, Sign in click on Add -> Sample then drag the portlet to the page and the form is displayed

5

When you click on the Submit button with an empty Firstname and Lastname you must get the following screenshot:

6with the correct data we get :

7And the console display the output of the method newUser()

8

JSF 2.1 Portlet with Liferay and Primefaces – Part 1

I want to create this suite of tutorial to show you how to build in fast way an application using the LR 6.1, JSF 2.1 and the Primefaces 3.3 witch delivered by default by the LiferayFaces plugin. I suppose that the Liferay installation and configuration is already prepared, if not please refer to this step-by-step  example to show how we do it.

Prerequisite

This example require:

  • Eclipse kepler with the Liferay IDE.
  • An instance of Liferay 6.1.

First Step

In the tools bare 7like shown in this image, click on the first button in the surrounded area, select New Liferay Project the following window is shown

1Enter the project’s name and select a portlet, then click Next, the next window look like this

2

Select JSF 2.x and PrimeFaces then click on Finish, So the Liferay IDE generate the project’s structure like the this

3

By default the Liferay IDE use the JSF 2.1.3, LiferayFaces 3.1.0 and PrimeFaces 3.3, but at any time we can replace this libraries with new ones, just make sure that libraries is compatibles.

Second Step: Make some changes

To make some errors away open the docroot/WEB-INF/faces-config.xml and remove the following code :

<lifecycle>
<phase-listener>com.liferay.faces.bridge.lifecycle.BridgeDebugPhaseListener</phase-listener>
</lifecycle>

then you can make some visual changes by opening   the file docroot/views/view.xhtml and add this code in the bady tag

<h:outputText value="#{i18n['my-first-portlet']}" />
<p:spinner />

and

my-first-portlet = This is my first portlet with JSF 2.1 and PrimeFaces 3.3

in the docroot/WEB-INF/src/Language_en_US.properties

Step 3 : Time to build and deploy.

Right-click on the build.xml file -> Run As -> Ant build, if the build fails and the  error “Task cannot continue because ECJ is not installed“, please refer to this link to get the solution.

In the Servers view 16

Right-click on  the server and select Start

Launch a browser and go localhost:8080, sign in , then click on Add -> Sample then drag the Tutorial portlet in the page :

4In next post we deep in more details and practical things

Some time we want to test the alfresco outbound email for sending notification when user is invited in site or business rule is executed, So we can use the Gmail as mail server for testing.

To do that go to <ALF_FOLDER>/tomcat/shared/classes, open the file alfresco-global.properties and add the following properties:

#  Gmail settings
mail.host=smtp.gmail.com
mail.port=465
mail.username=user@gmail.com
mail.password=password

# New Properties
mail.protocol=smtps
mail.smtps.starttls.enable=true
mail.smtps.auth=true

mail.testmessage.send=true
mail.testmessage.to=user@gmail.com
mail.testmessage.subject=Outbound SMTP
mail.testmessage.text=The Outbound SMTP email subsystem is working.

By Default Alfresco disable sending email when user is invited on site, that must be activated like the following

### E-mail site invitation setting ###
notification.email.siteinvite=true

Some beginner users forgot to add email to the user testing the email notification, and so no email is sent to recipients, when this is your case go to the user profile and add an email account to test with it.

Finally you must to restart alfresco to make this configuration in action.

In a previous post we talk about how to setup Liferay development environment, we discussed steps  followed to install Eclipse, MySQL and Liferay.

As known in the development world that the debugging has a special importance for more productivity and rapidly detecting bugs and errors. for that reason I want to share in this post my experience on how to debug the Liferay code source. In this example I use liferay-portal-src-6.1.1-ce-ga2 you can download it from (link).

After downloading the zip file (liferay-portal-src-6.1.1-ce-ga2.*.zip) , extract it in the workspace in the following folder<LIFERAY_WORSPACE>/liferay-portal-src

1

Launch Eclipse, then import this code source as eclipse project as the following:

Select in menu File -> Import…

2

Select Existing Project into Workspace, then click Next, in the next step click Browse and select liferay-portal-src finally click Finnish.

3

For example if you want to debug the login action  in Liferay, go to the LoginAction Portlet and make a breakpoint in the  processAction method (the LoginAction Portlet is located in portal-imp/src/com/liferay/portlet/login/action/LoginAction).

Select the Servers view, Right-click on the server and select Debug

4

Launch a browser and go to localhost:8080. Click on Sign In, enter the login and password click on the login button and …

5

that’s all

Hello to every one,

In this article I’ll show you how to prepare a development environment for Liferay 6.1  and eclipse, that will help you to quickly start your development in such envirenment.

1- Prerequisite

Note : It’s preferable that the JDK 6+ was already installed to have a stable environment.

2- Install liferay 6.1

create a workspace folder, then create the following structure under this workspace:

  • workspace -> bundle
  • workspace -> liferay-plugins-sdk

After downloading the liferay-portal-tomcat-6.1.1-ce-ga2.zip, extract it in the bundle folder

2-folder-structure

then extract the file liferay-plugins-sdk-6.1.1-ce-ga2.zip in the liferay-plugins-sdk folder like this:

33- Liferay IDE installation

Run the Eclipse and select the the workspace defined previously, then go to help->marketplace and enter “liferay IDE” in the search box and click on the “Go” button, the Liferay IDE is displayed in the response list   :

4

Click on “install” and follow steps in the installer wizard, when this window is displayed click on “OK”

5the continue the installation, if the installation is finished successfully the Eclipse invite you to restart it, please click “Yes”, Now you can see the liferay’s button in toolbar.

7

4- liferay IDE configuration

liferay IDE depends on the Liferay SDK as basis to create liferay’s project like portlets, hooks,etc… And to that the liferay IDE must be configured as the following

  • Select in the menu : Window -> Preferences ->Liferay -> Installed Plugin SDK

8then click on the “Add” button,  the next window were displayed

9

Click on the “Browse” button to select the folder of plugin SDK installation , the click “OK”. the project is like this in Eclipse

10

5-Configure JDK in Eclipse

click on the menu Window -> Preferences -> Java -> Installed JRE

14then click on “Add”, Select “Standard VM”, click on “Next”

15in the end click on “Finish” and “OK”

Liferay Tomcat configuration

Select the “Servers” view. If is not displayed, please go to Window ->Show view ->Other -> Servers

11

inside the view make a right-click, select New -> Server   a window like this will be displayed

12Select “Liferay v6.1 CE Server (Tomcat 7)” and click on “Next”, a window like this will be displayed

13Click on “Browse” , go the workspace/bundle/Tomcat-7* directory , On the runtime JRE option enter the JDK already configured then click on “Finish”.

Running the Liferay Tomcat 7.

Before running the tomcat server, you must install and configure  the mysql server databases and  Create a database with the name “lportal”

In the “Servers” view right-click on the “Liferay 6.1 tomcat “server

16then Click on “Start” , I want to not that liferay at first starting up use the HSQL database server as default database server So you must do some modifications in order to use the MySQL

6-Liferay portal Configuration.

When the server complete his starting, open the browser and in enter this address localhost:8080

17click on change, in the drop down box select MySQL,  enter the Mysql’s username and password, for the other fields you can use the default values then click the finish configuration.

In the Next article I will show you how to create and deploy a liferay project.

In some situations we need to intercept the method execution at runtime to inject some code in post and pre-execution, for example adding logging, handling exceptions or any other manipulation will be injected during the execution of the program.

In this article I want just to make a some highlights about how to use Guice to inject code at runtime. So let’s begin.

1- Create a Maven project  in eclipse, then add this dependencies to pom.xml file:
<dependencies>

<dependency>
<groupId>com.google.inject</groupId>
<artifactId>guice</artifactId>
<version>3.0</version>
</dependency>
<dependency>
<groupId>aopalliance</groupId>
<artifactId>aopalliance</artifactId>
<version>1.0</version>
</dependency>
<dependency>
<groupId>javax.inject</groupId>
<artifactId>javax.inject</artifactId>
<version>1</version>
</dependency>
<dependency>
<groupId>log4j</groupId>
<artifactId>log4j</artifactId>
<version>1.2.16</version>
</dependency>
</dependencies>

2- Project structure:

guice-interceptor

The most important part in this structure is module, because the Guice philosophy  based on the principle of modules, well. Now we want for example to handle Exception for some method without adding try-catch for any method, we just need to create an annotation like this :

@Retention(RetentionPolicy.RUNTIME)
@Target(ElementType.METHOD)
public @interface HandleException {

}

3- The handle Exception interceptor

public class HandleExeptionInterceptor implements MethodInterceptor {
private final static Logger log = Logger.getLogger(HandleExeptionInterceptor.class);

   public Object invoke(MethodInvocation invocation) throws Throwable {
Object result = null;
log.info("The Guice method interception");
try {
result = invocation.proceed();
} catch (Exception e) {
log.error(e.getMessage(), e);
}

     return result;
}
}

in this class we determine where to inject the exception handling, that explain for every method annotated with @HandleException is automatically surround by the try-catch statement. Next we create   a module to bind the interceptor with the annotation:

public class HandleExceptionModule extends AbstractModule {
@Override
protected void configure() {
this.bindInterceptor(Matchers.any(), Matchers.annotatedWith(HandleException.class), new         HandleExeptionInterceptor());
}
}

In the service class we add the  @HandleException to intercept the method

public class DailyReportManager implements Serializable{


private static final long serialVersionUID = -2533568079721356848L;


@HandleException
public void interceptmethod(){
throw new RuntimeException("Exception throws when intercepting the method");
}

To execute the program, we make this code

public static void main( String[] args )
{
Injector injector = Guice.createInjector(new HandleExceptionModule());
DailyReportManager reportManager = injector.getInstance(DailyReportManager.class);
reportManager.interceptmethod();
}

It’s very important to note that only instances managed by Guice can use this technique, that means if you create an DailyReportManager instance with the new keyword, the interception cannot work.

The source code is available here

I hope that post can be useful for every one.

بسم الله الرحمن الرحيم

I’m going to put here snippet from Portlet Specification, version 2.0 shows objects that can be used in JSP page in case the tag defineObjects has been used .

“The defineObjects tag must define the following variables in the JSP page:cccxiii
• RenderRequest renderRequest when included from within the render method, null or not defined otherwise
• ResourceRequest resourceRequest when included from within the serveResource method, null or not defined otherwise
• ActionRequest actionRequest when included from within the processAction method, null or not defined otherwise EventRequest eventRequest when included from within the processEvent method, null or not defined otherwise
• RenderResponse renderResponse when included from within the render method, null or not defined otherwise
• ResourceResponse resourceResponse when included from within the serveResource method, null or not defined otherwise
• ActionResponse actionResponse when included from within the processAction method, null or not defined otherwise
• EventResponse eventResponse when included from within the processEvent method, null or not defined otherwise
• PortletConfig portletConfig
• PortletSession portletSession, providing access to the portletSession, does not create a new session, only returns an existing session or null if no session exists.
 • Map<String, Object> portletSessionScope, providing access to the portletSession attributes as a Map equivalent to the
PortletSession.getAttributeMap() call, does not create a new session, only returns an existing session. If no session attributes exist this method returns an empty Map.
• PortletPreferences portletPreferences, providing access to the portlet preferences.
• Map<String, String[]> portletPreferencesValues, providing access to the portlet preferences as a Map, equivalent to the PortletPreferences.getMap() call. If no portlet preferences exist this method returns an empty Map.
 These variables must reference the same Portlet API objects stored in the request object of the JSP as defined in the PLT.19.3.2 Included Request Attributes Section.
A JSP using the defineObjects tag may use these variables from scriptlets throughout the page.
The defineObjects tag must not define any attribute and it must not contain any body content”
An example of a JSP using the defineObjects tag could be:

<portlet:defineObjects />
<%
   WindowState windowState = null;
   PortletMode portletMode = null;

   if (renderRequest != null) {
       windowState = renderRequest.getWindowState();
       portletMode = renderRequest.getPortletMode();
   }
%>

و الحمد لله رب العالمين


Rejoignez Viadeo, le réseau social professionnel choisi par Khalid HORRI et plus de 35 millions de professionnels

Categories

Archives

Enter your email address to subscribe to this blog and receive notifications of new posts by email.

Join 60 other subscribers